Friday 25 March 2011

It'll be great when it's finished

Our house continues to attract considerable attention from passers-by, who often stand at the gate and will ask me questions if I am seen.  I have lost count of the number of people who have looked at our house and said "it'll be great when it's finished".  The latest was the blonde lorry driver who delivered the possibly last full load of lime mortar and plaster on Tuesday.  The thing is that I think it's wonderful already!  I'm starting to really think it won't be long now before we can move in, and the kitchen installation is planned for June 13th, so I have a fixed deadline.

This week has seen the completion of the smooth plaster skim of all the walls and ceilings in the whole upstairs, and also down the stairway to the hall.  Hopefully, next week will see the completion of the plaster in the lounge and most of the hall and kitchen.  We have also replaced the old front door and frame with identical new ones (left), specially made at great expense; this was a necessary extravagance, as the old items (right) were really rotten at the base, and well past repair.  The door should get painted this week, and then we can fit the door furniture; one task at home this week was to partially clean the genuine antique doctor's door knocker with vinegar. 

We had a small crisis this week when the only tap in the house refused to turn off, and so I rang Steve the plumber.  He suggested that I tried the rising main which I dreaded as I knew it was very stiff.  Of course, when I tried to close that, it started dripping as well!  Eventually, after an awful lot of water had gone down the drain, Steve came and we now have a new rising main (right, if you don't know what one looks like!) and a new tap (which will be re-used as the outdoor tap later).  Steve will be back next week as the bathroom stuff has arrived and fitting will start.

On the subject of water, I have asked for a water meter (I'm glad it wasn't done before, considering the leak we had).  On Thursday this week a man came to do a survey, and he expressed some surprise at being told to come here because he reckoned that no-one lived here (which is technically true at the moment) and that the house was derelict!

Last Saturday also saw a major step forward as I lit a huge bonfire.  In four hours I burned all the ivy from the front of the house which was cut down last November, the branches from the pear tree which grew three inches from the house, and the buddleia, plus a good number of bits of rotten wood mostly from the joists.  This was a really huge fire (viz the pile in the photo left) and the ashes were still warm on Tuesday afternoon.  The result was that for the first time the whole garden was visible and accessible.  The sense of space and light are a massive improvement over the damp enchanted forest which we encountered on our first visit last August.

Sunday 20 March 2011

A floor to dance on, and A Mystery

This week's success was finding and installing some reclaimed flooring in the lounge.  I started the lounge floor job last November, and did repairs to the joist ends in one half of the room; basically the joists were rotten wherever they were close to a wall!  This let me keep the other half as a datum as I had no intention of doing a complete new floor from scratch.  However, when refitting the usable boards to the first half, I found that the boards were all different widths, which made the job immensely more difficult as I couldn't just use any board in any position, but had to find serviceable matching pairs to cross the room.  My next problem was that I went to the wrong reclamation company who didn't deliver the 24mm thick floorboards which they promised.  I then found that I was driven by the various contractors who needed me to do preparation of some sort to keep everything going (OK, I could have paid for someone else to take off the old plaster...) and the floor took a back seat for a long while.  Two weeks ago I found a gap in my own schedule and did enough of the floor to let me start on the other half of the room - hence the joist story earlier this month when I removed the remaining floorboards.

On Wednesday this week I re-visited another reclamation yard which had no floorboards when I had visited before.  This time I was lucky as they had a huge pile of reclaimed pile, 20mm thick and 200mm wide.  I reasoned that I could plane down the edge of the last 24mm board and so this thickness would be OK.  Then I persuaded the lad to go through the pile with me so that I could choose over 100 feet of matching boards of suitable lengths, and they even delivered for free that same afternoon! 

So, Thursday's task was to finish off the joists in the front half of the room where it had all been so damp.  I got quite bored cutting nine notches in lengths of new 4x2 to retain the same level when replacing the slightly different sized older joists.  This worked surprisingly well - I won't bore you with my calculation and cut marking technique but it worked!  The photo (right) shows the joists in the bay window; note that I have not changed the position of the joists at all - the ends you can see are original, apart from the two where I have added an end-piece after sawing off the very end in order to retain as much as possible of the original wood.

Then I started to fit the new (reclaimed) boards and the floor was virtually finished by Friday; it would have been completely finished but I ran out of screws.  I also had a single uncorrectable mistake, when my very last saw cut was 10cm short...  Fortunately Jane was going past the reclamation yard later, so she picked up another 2 metre length for me.  The photo (left) shows the almost finished floor in the same bay window - it's almost fit to dance on (if I could).

Other Progress

Plastering has continued; progress is slower than I had anticipated.  Doing the two skims over three major items takes two days, so in four days this week, Phil did three ceilings and three walls (plus a few other odd bits).  We hope to have finished the upstairs completely by the end of next week, and another week should see downstairs done apart from the walls with the two chimneys and the kitchen window wall.  We are progressing and the end is in sight, but it has been a long haul.

We have also just received Listed Building Consent for the various items already mentioned such as the new fires, the kitchen floor etc.  Hooray! First major hurdle over.

A Mystery

Finally, an unsolved mystery: I have gained a step ladder.  I don't have a photo of it but I'm sure you can use your imagination.  On Wednesday I thought I heard a sound at the back door, but when I checked there was no-one there.  An hour later, going outside, I noticed that there was an aluminium step ladder propped on the wall a few yards past the door.  Phil and Jaye agreed definitely that it was not there earlier, so where it came from is a mystery.  If it was one of my other contractors I cannot understand why they would leave it here now as they are not expected back for weeks.  In any case, anyone who knows me wouldn't just leave it without a word, they'd pop in for a chat, wouldn't they?

Saturday 12 March 2011

Ivy is The Enemy (and Fun with Joists)

Apologies to anyone called Ivy - I assure you that this is nothing personal.

When we bought our house, there was a very large growth of ivy up the front corner and over a good part of the roof (photo left).  This growth, reckoned to be over thirty years old, had damaged the gutters and filled them with compost so that no rainwater flowed at all in almost half of the roof's guttering.  The ivy was so thick that it had actually protected the stone wall which was in great condition, but at the edges of the ivy the wall was green and damp (well, that rainwater had to go somewhere!).  This ivy has been removed (photo right), leaving only a large stump of multiple stems about a foot high beside the corner.

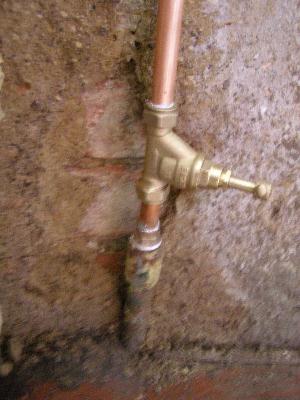
This week, inside that corner of the wall, I have recommenced work on the floor joists.  I already knew that the joist beside the wall was rotten due to damp as a result of the concrete path being too high.  However, I was surprised to find something which, at first glance, appeared to be a 1.5" iron pipe, right in the corner.  Closer inspection showed that it was, in fact, a root of ivy!  Somehow this has penetrated the 18" thick wall, and then it dives down underneath the end supporting wall for the joists (see photo, right).  Happily, the root was easier to cut than the trunk of the ivy which I have been trying to remove for ages.

You might think that ivy looks pretty on the side of your house but, believe me, you need to treat it as the Number One Enemy - get rid of it.  Given half a chance, it will do all sorts of damage, by growing into (and through!) walls, under lead flashing, between junctions in gutters, under slates/tiles, and so on, causing damage which will probably be seen first as dampness.  By then it is TOO LATE and you are already into expensive repairs! 

More Fun with Joists

Continuing the joist work, I then removed the floorboards in the rectangular bay window; this was a known problem area which I had been avoiding for some time.  I fully expected to have to replace most of the six joists, as I had previously found all the skirting board very rotten.  Of course, I should have known better: whilst removing the boards it was clear that there were bigger issues, as some of the joists were not attached to anything except the boards!  The joist at one end of the window (lying on its side on the right of the photo) was the worst, as the wall plate on which it was meant to be resting had also rotted into oblivion at that end.  The photo (right) shows (top left) the remaining piece of the wall plate and a surviving joist (centre).  In fact, the whole wall plate was rotten and pretty useless so I lifted that out, together with four of the joists.  I then could see that the two brick-high supporting wall was actually pretty bad as well; the bricks were all loose and, in its 1.75m length, there was a gap of about 50cm.  It also suffered from being built too close to the outside wall; the gap was about 5cm at most.  Consequently all the stuff which falls down the end of the floorboards (like plaster and rotting skirting boards) had been trapped between the two walls, even covering the wall plate.  As the outside wall was damp (high ground and the rainwater falling from the broken gutter), the dampness had been allowed to invade the inside and this is why the wood had rotted.

Thus it was today that that I found myself mixing a load of hydraulic lime mortar in my own mixer (for the first time), rebuilding the supporting wall and fixing a new wall plate, instead of just using the same bit of 4x2 to replace some joists.

I decided to improve the design by building the new wall three inches further in, thus allowing space for any future debris.  As with joinery, I find this sort of thing quite satisfying, even though it wasn't the task I intended to do.

As part of this job I realised that I had not seen evidence of the air-brick; a long time ago I had ensured this was clear outside to encourage ventilation.  Closer investigation revealed that there was a large clump of cement covering it, which I then removed with a couple of taps with a club hammer.  Presumably it had been blocked because it was causing a draught, but whoever did it seemed to be entirely unaware that its function is exactly that!

Thursday 3 March 2011

Plaster Progress, and Felling a Tree using Lime Mortar

Good progress on plaster has been made this week.  The first of the skim has been applied and the results are fantastic - Jane has "never seen such smooth plaster" (although I had never really noticed her caressing plaster before!).  I've been asked to always include photos, but seriously, it is very difficult to take interesting or even comprehensible photos of grey plaster.  Trust me - it is smooooth.

For the record, we have been putting on a haired scratch coat of 3:1 (aggregate:lime) mortar, followed by a float coat of the same without hair, then a skim of lime plaster (3:2) which is sponged, followed by a thinner skim of Regency plaster (really fine stuff) which is trowelled smooth.  Pre-mixed products take one variable out of the equation, and are available from Mike Wye (www.mikewye.co.uk) who have been very helpful with advice; I thoroughly recommend them.

It was the eighth delivery of a 900kg pallet of lime mortar and plaster which caused me to tackle a job this week which I had been deferring.  There's a holly tree near our front gate which is smothered in ivy; it's a trunk about ten feet high, very top heavy and leaning towards the pavement, about 25 degrees from vertical.  The rope in the picture right shows the true vertical.  I know how to cut a tree down, but this one needed special attention because of the safety aspects of the leaning - I did NOT want it to fall the wrong way!  I have a new 10 mm nylon rope and just needed something to attach it to in the middle of the lawn.  Thinking about this in the night recently (sad, isn't it?) I realised that the answer was a one tonne pallet of lime mortar!

So, when a delivery came at 10am one day this week, it gave time in the day to tackle this vexing question.  A pair of pallets was piled in the middle of the lawn, with my rope securely attached to the centre (so that the wood could not break and let the rope pull free).  The other end of the rope was tied around the top of the tree.  Then the mortar (in 45 ten litre tubs) was unloaded from the roadside by hand as normal and loaded onto the pallets and the tension in the rope was increased by propping another pallet underneath (see photo left).  Then taking a deep breath, it was time to start sawing a slice out of the tree on the lawn side.  I chose to start about a metre up, as that seemed about right (using my Chartered Engineer's judgement), and I was quite surprised how easy it was to cut the ivy/holly.  The "melon slice" was removed, but I thought that I had only cut about a quarter of the holly.  Nevertheless, we thought we'd try to just pull on the rope before I bothered to cut the opposite side of the tree a bit higher up.  Perhaps Jaye (the spread's labourer) is stronger than he looks, because with three rhythmic pulls, there was sudden movement and the whole top came towards us and fell at our feet (photo right).
The photo of the cross-section (left) shows that, in fact, I had cut about half of the holly tree as well as the complete ivy (which was actually a greater cross-sectional area).

The additional good news is that the view of the house from the road is much improved (right), even though neither Jane nor the neighbour noticed when they walked through the gateway!